To change the Disposition of Tote
- Select the Change Disposition option from the menu.
You will see the following Change Disposition home page:
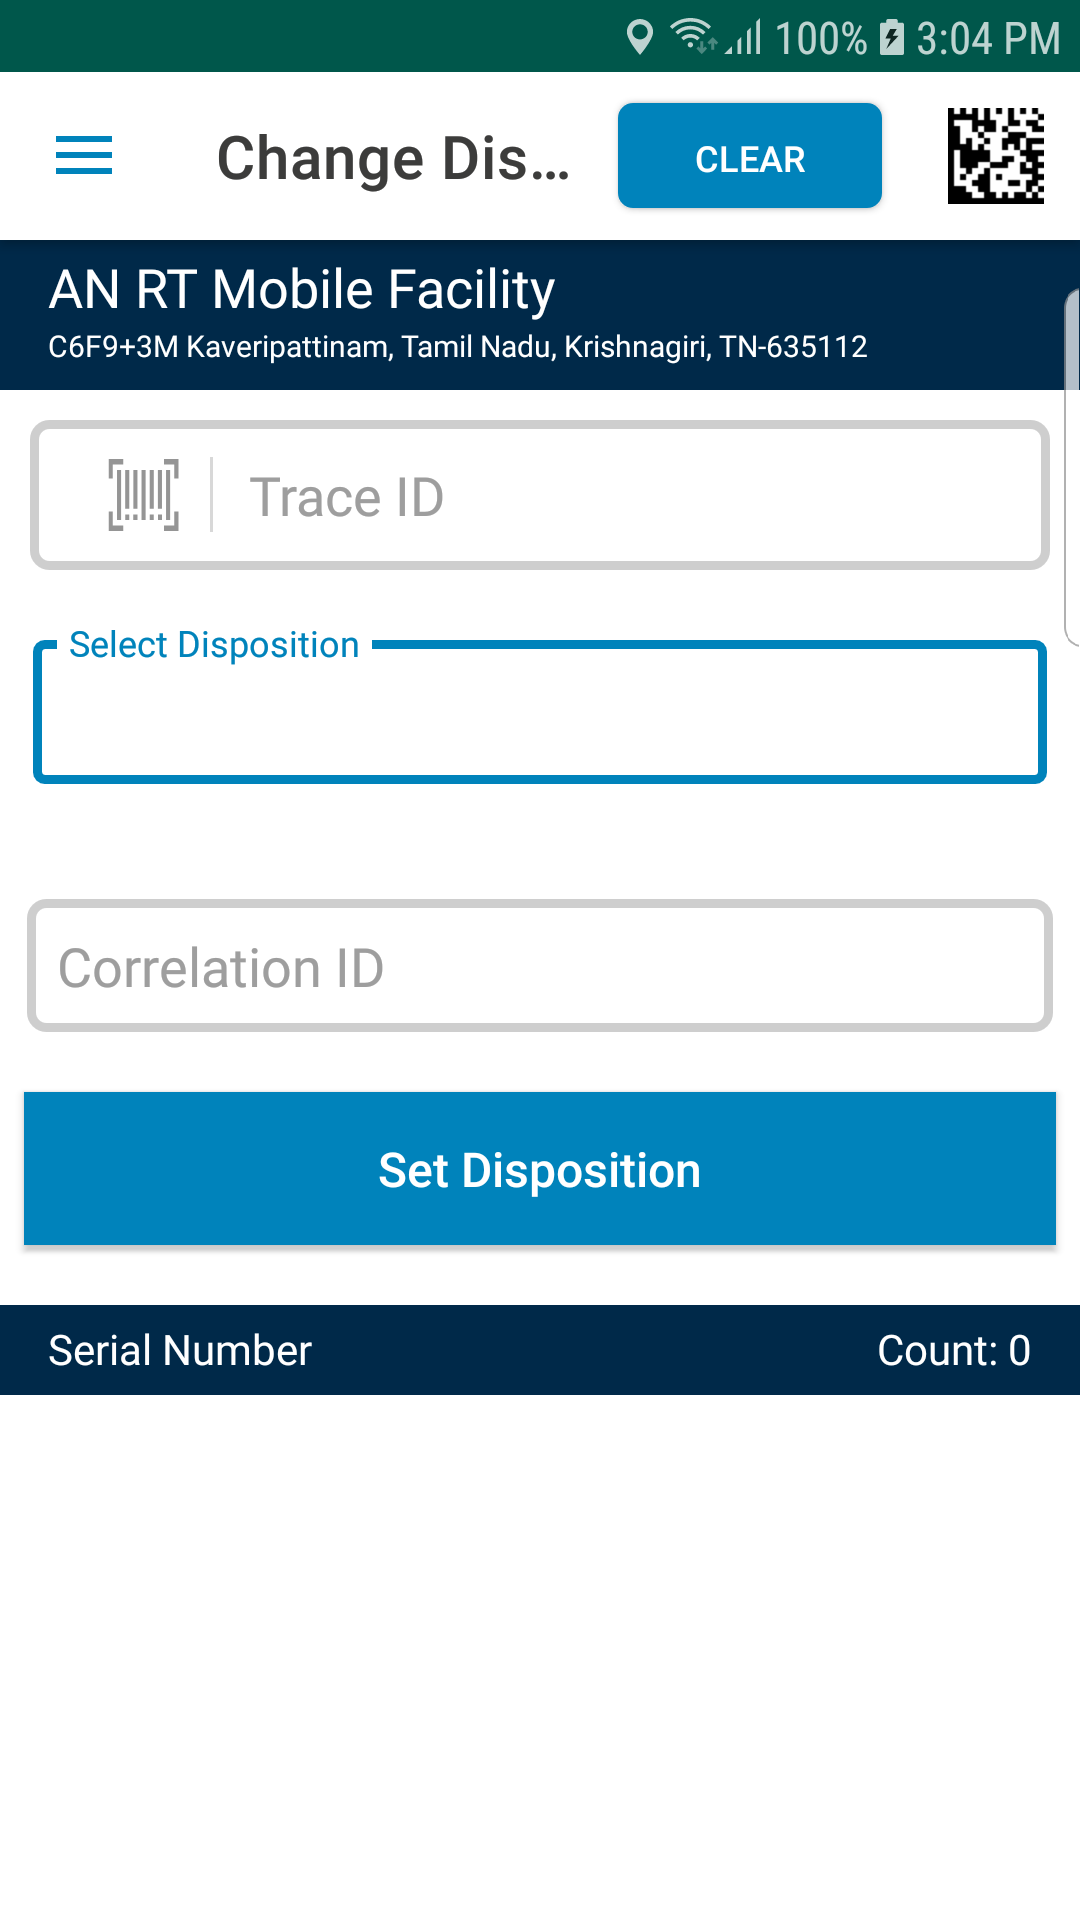
- Scan the barcode of the Tote (s) you want to change the disposition.
- The scanned barcodes will be added to the list which will be indicated as in the below screen:
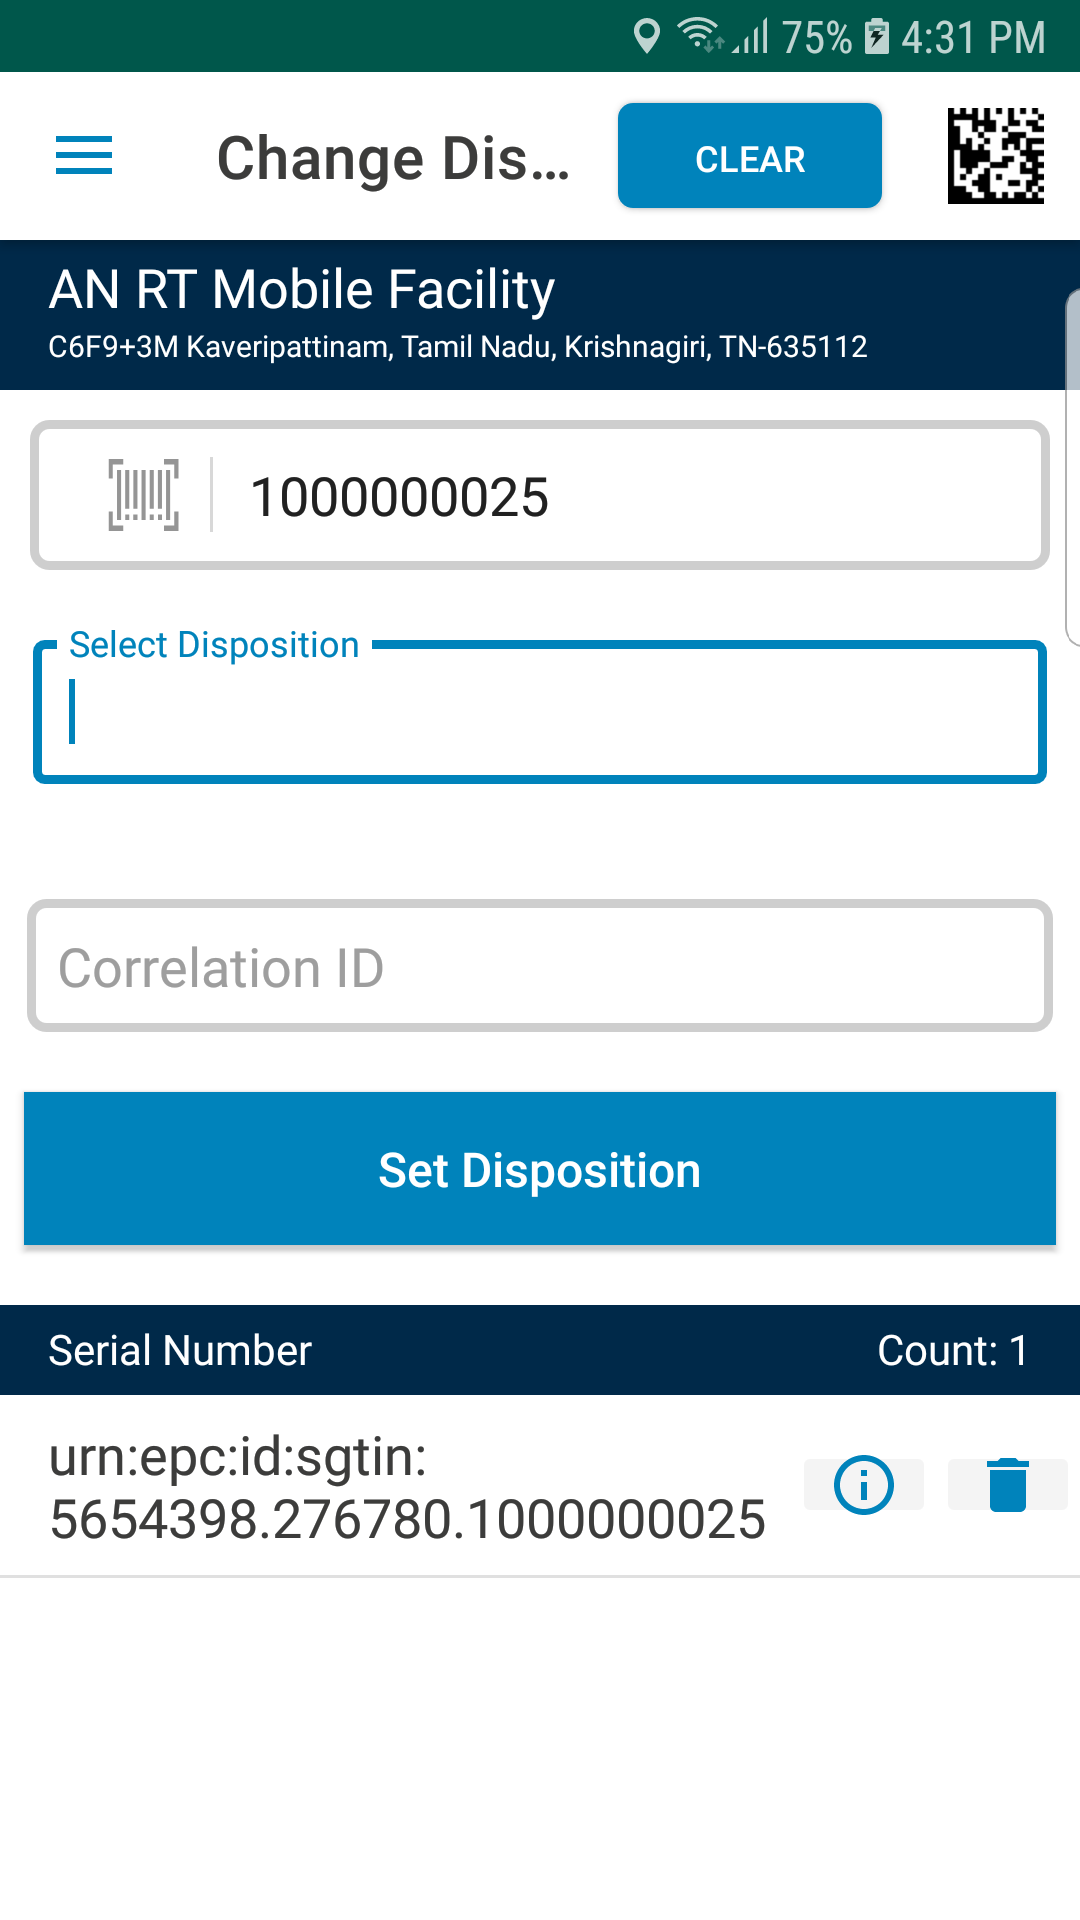
- Enter the Correlation ID. This field is optional. When this field value is provided, the value will be displayed in the Change Event details page.
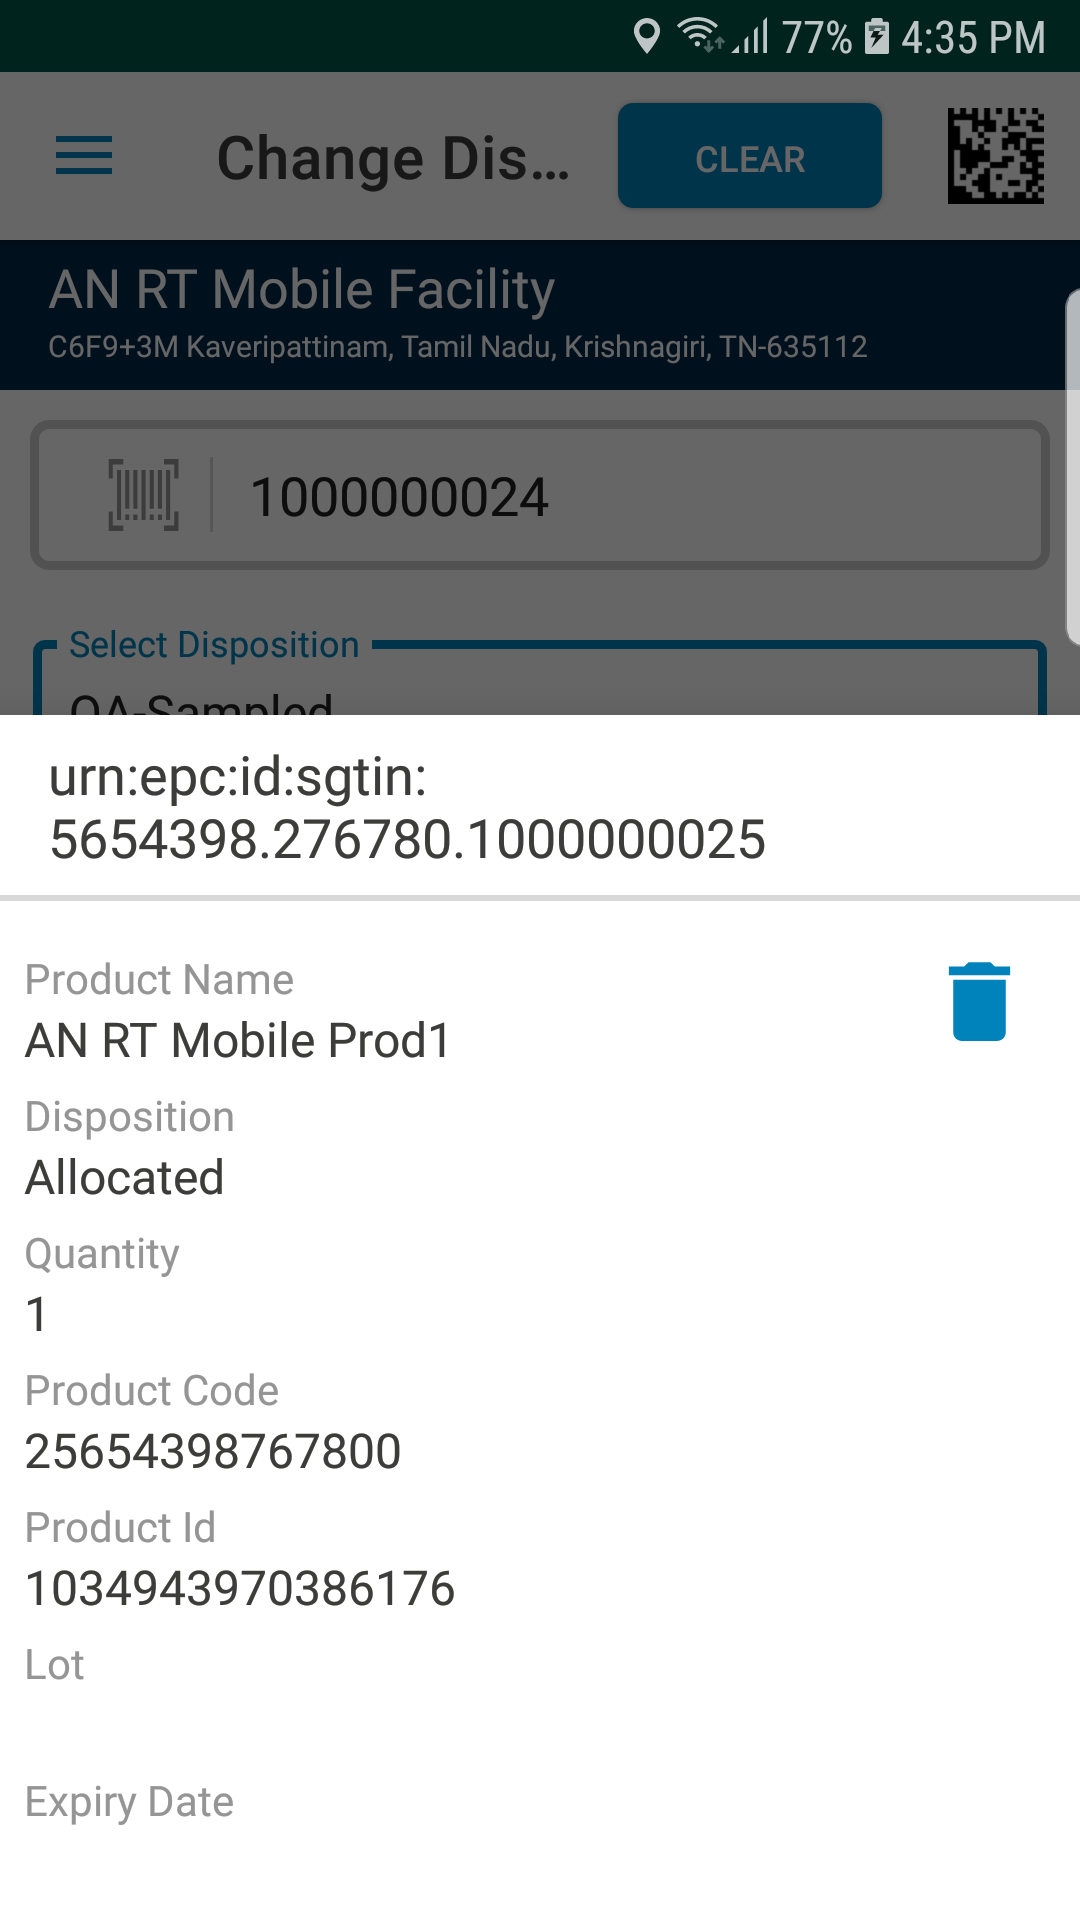
- Tap on the View Details icon to see the details of the added item.
You will see the details as shown below:
Note:
You can use the delete icon to remove a child item from changing the disposition.
You can pull the screen down to go back to the previous screen.
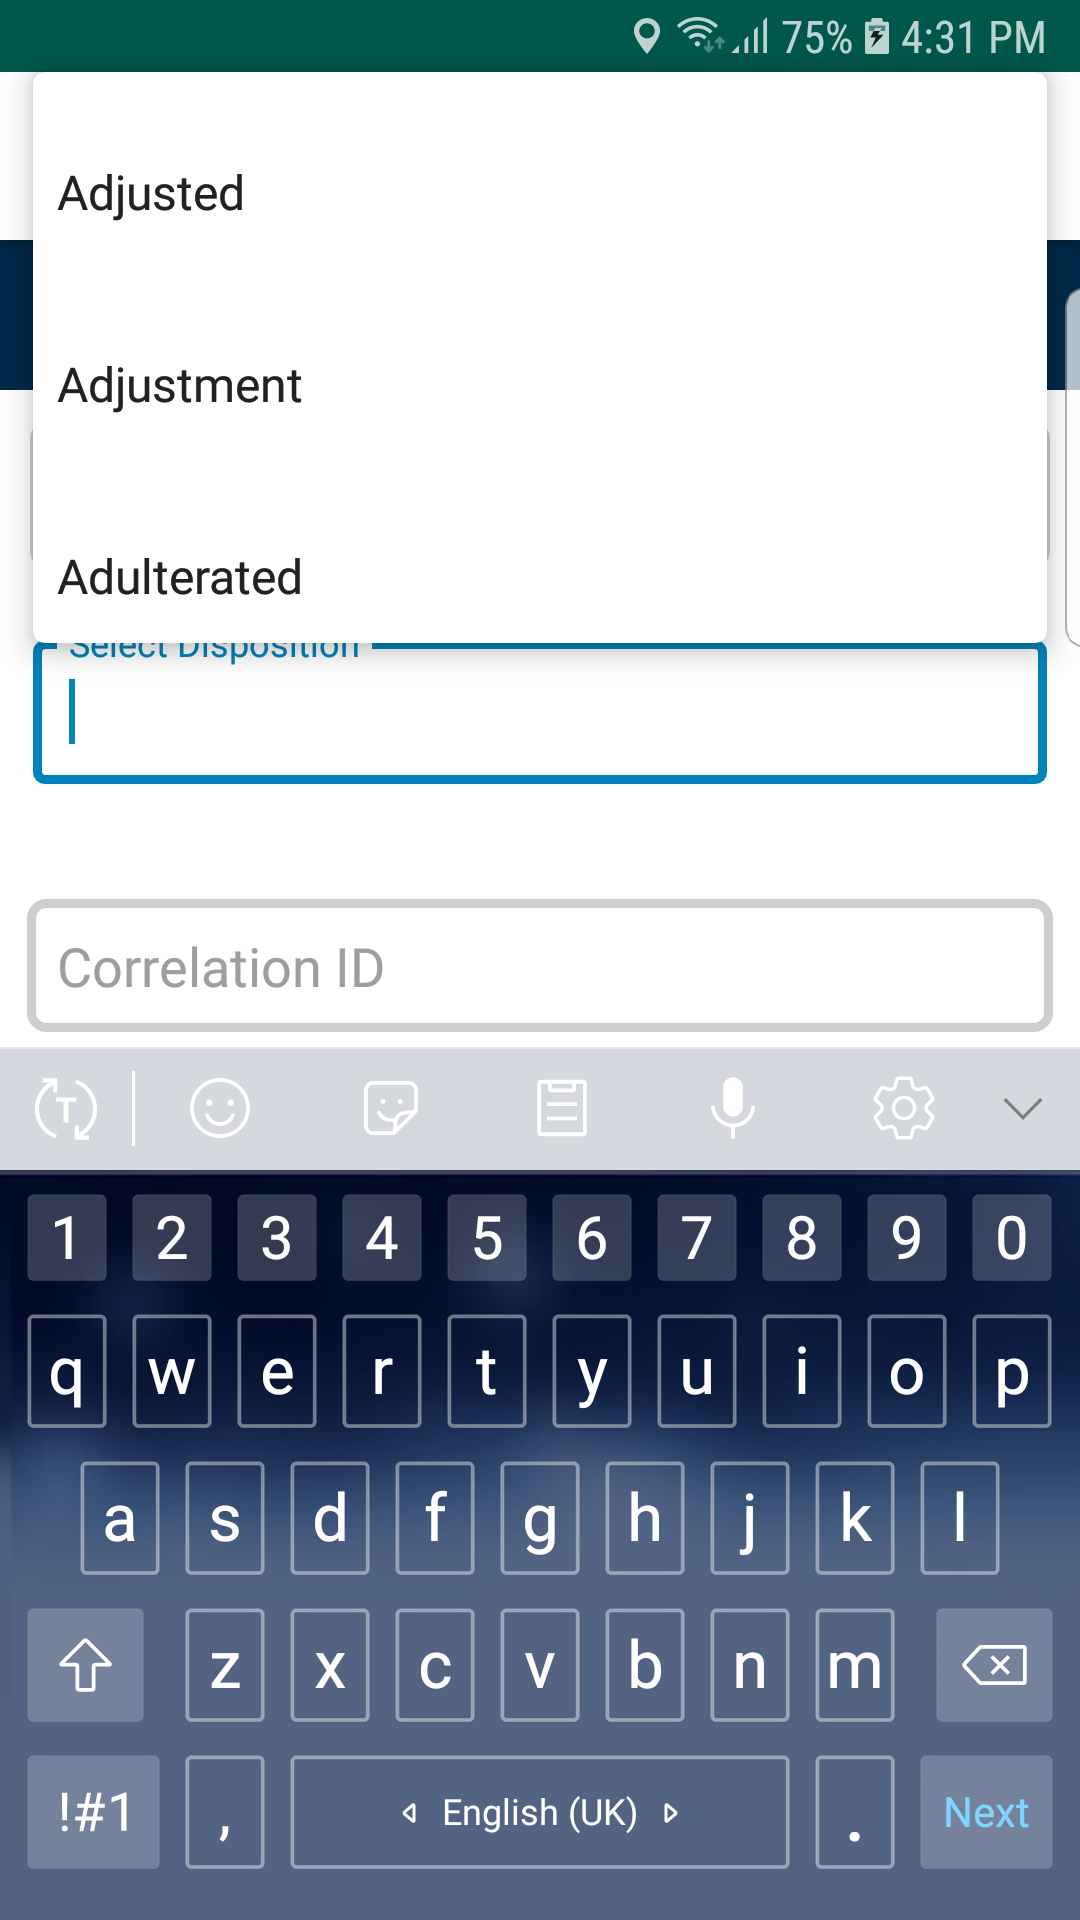
- Select the new disposition from the drop-down list of Select State:
- Tap on Set Disposition option.
You will be asked for confirmation as shown below:

- Tap on Ok to apply the disposition. Tap on Cancel to cancel the process.
When you click OK, if the selected serial number is in an aggregated hierarchy, you will see the following message:
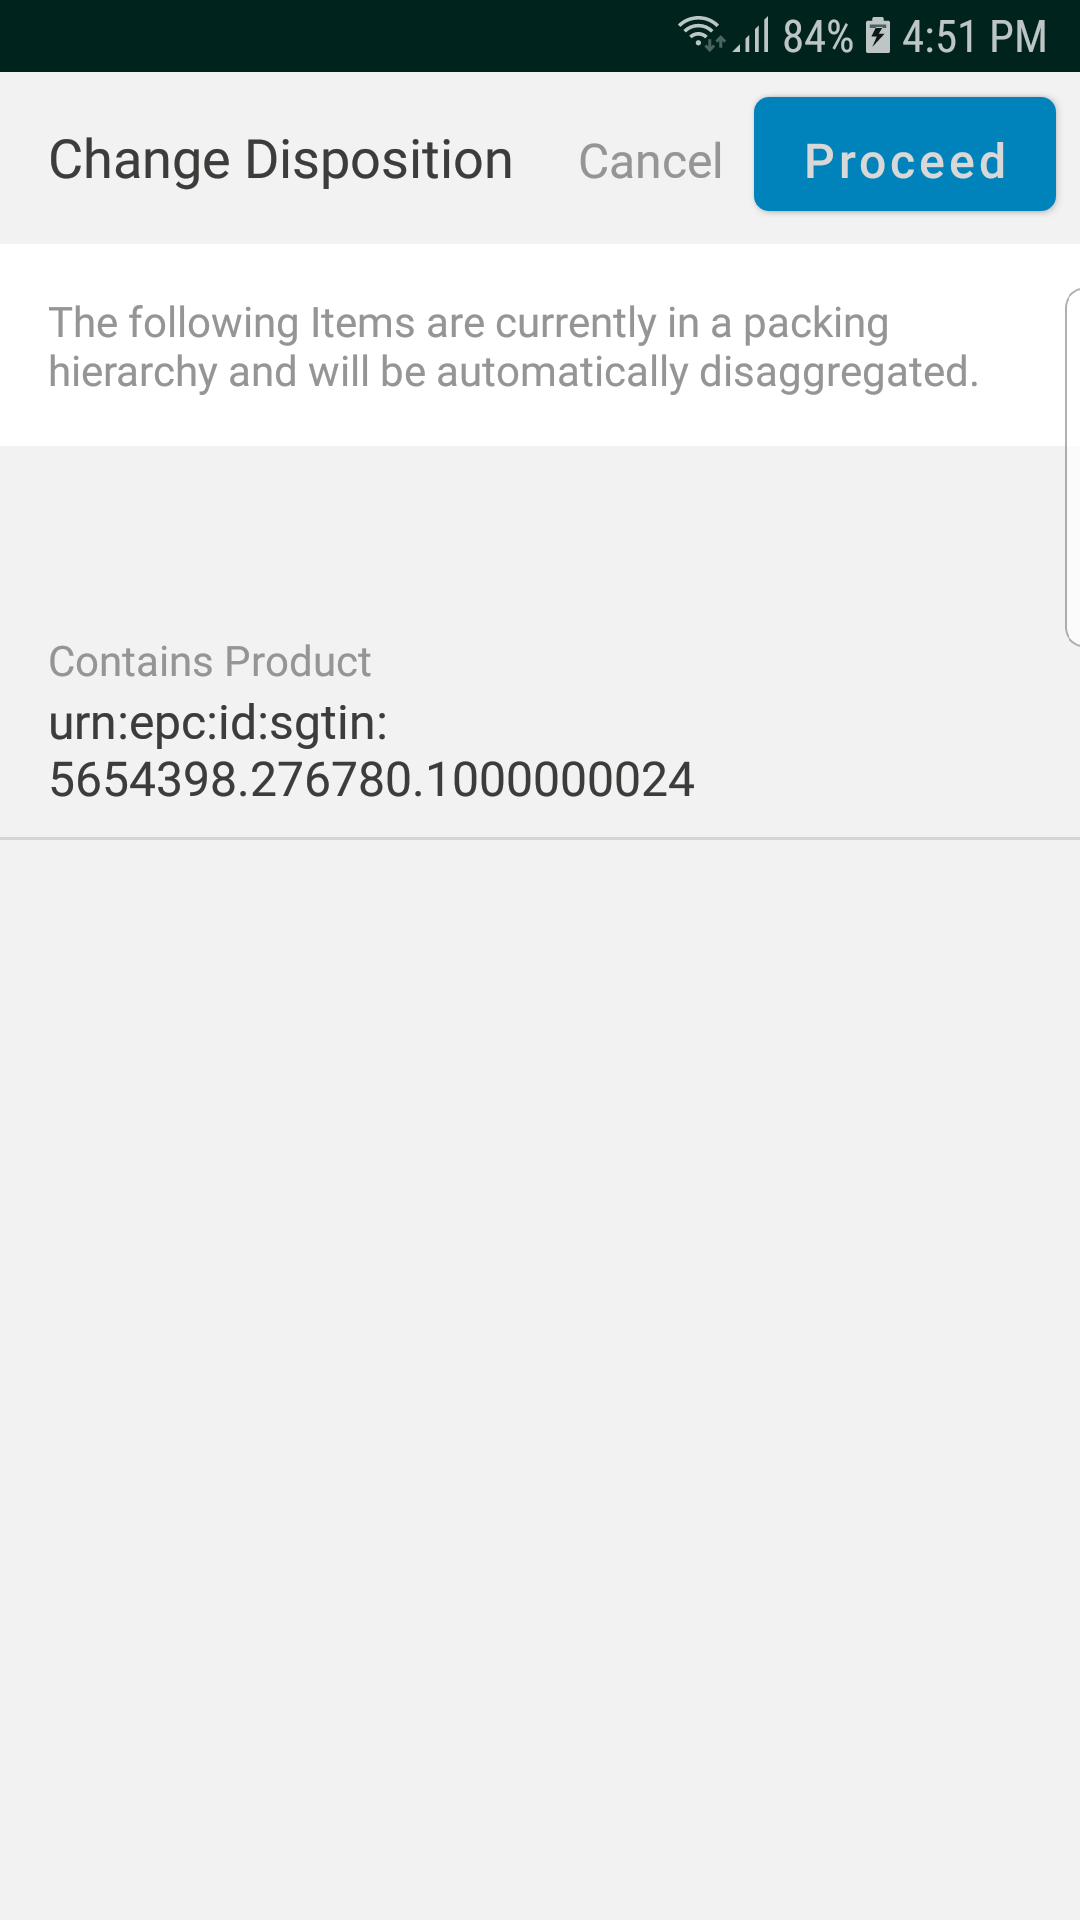
- Click Proceed button.
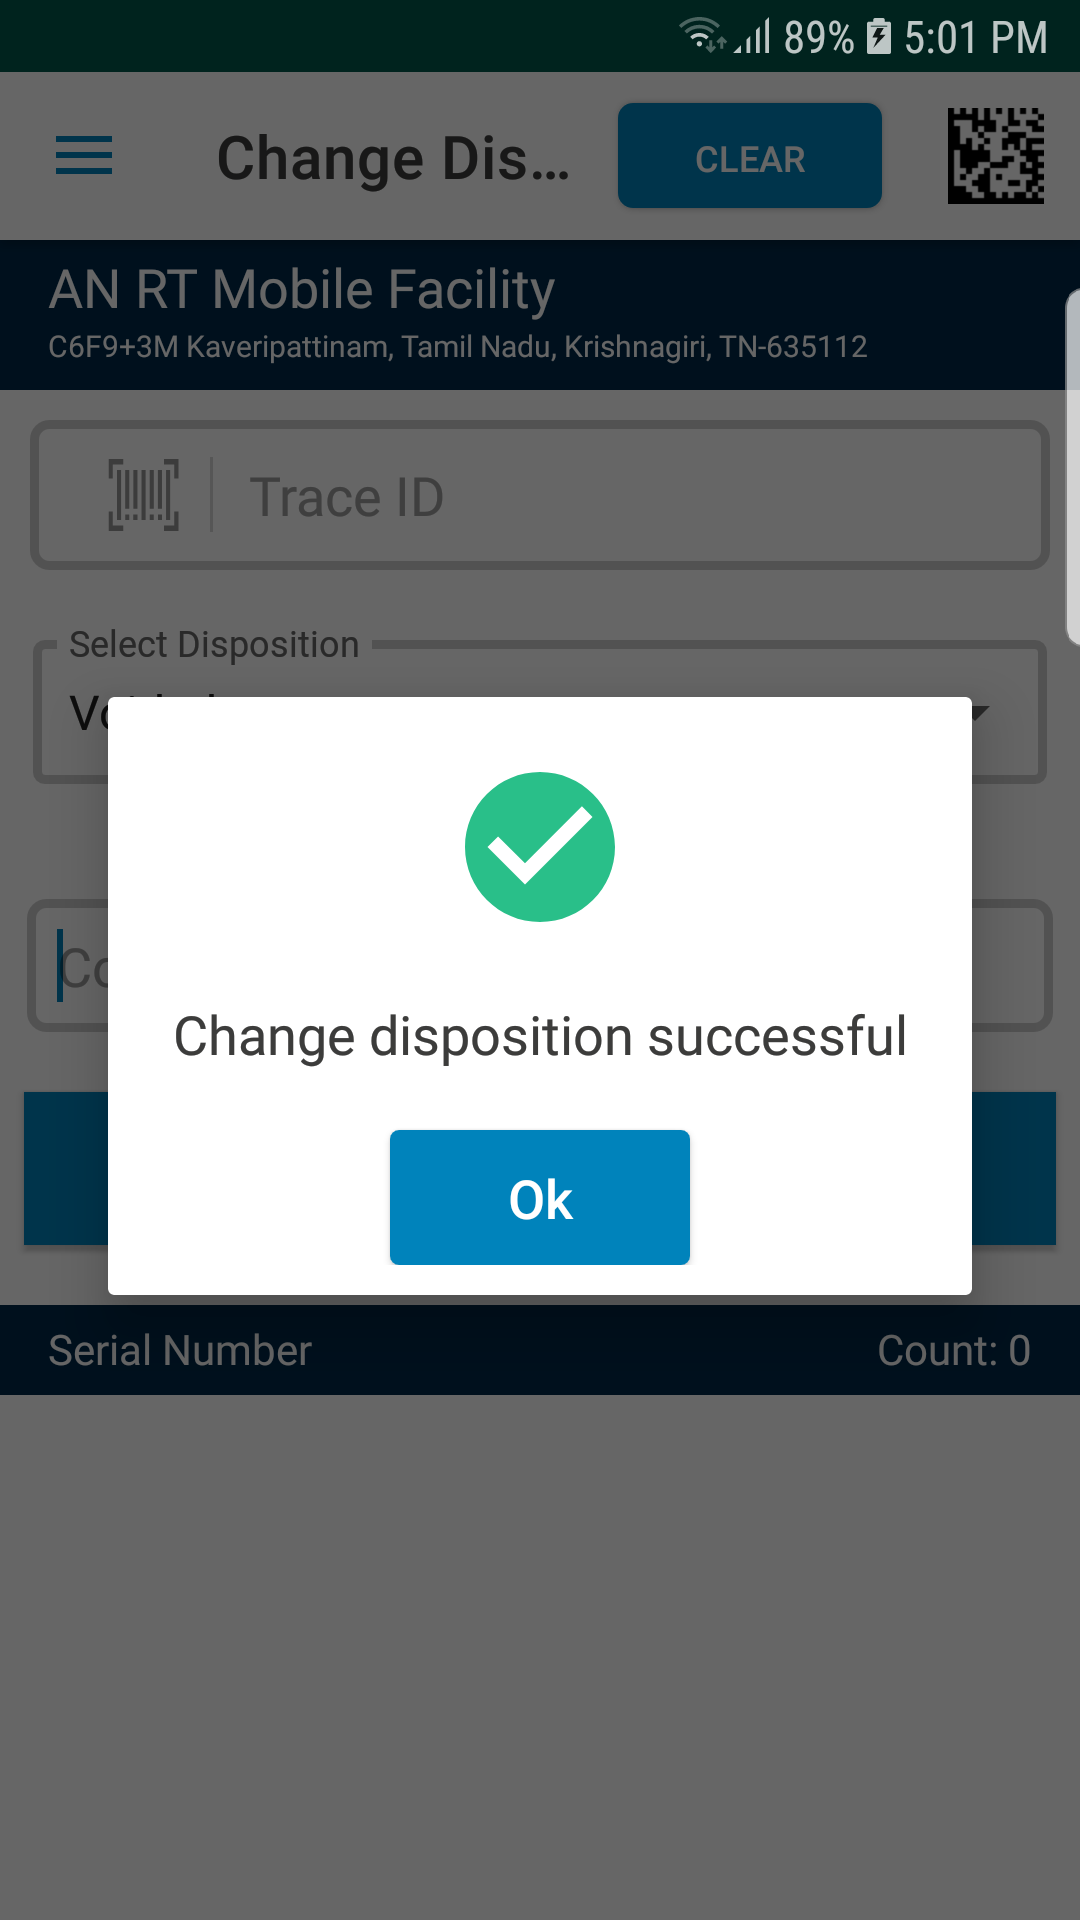
If the change disposition is successful, you will see the following confirmation message:
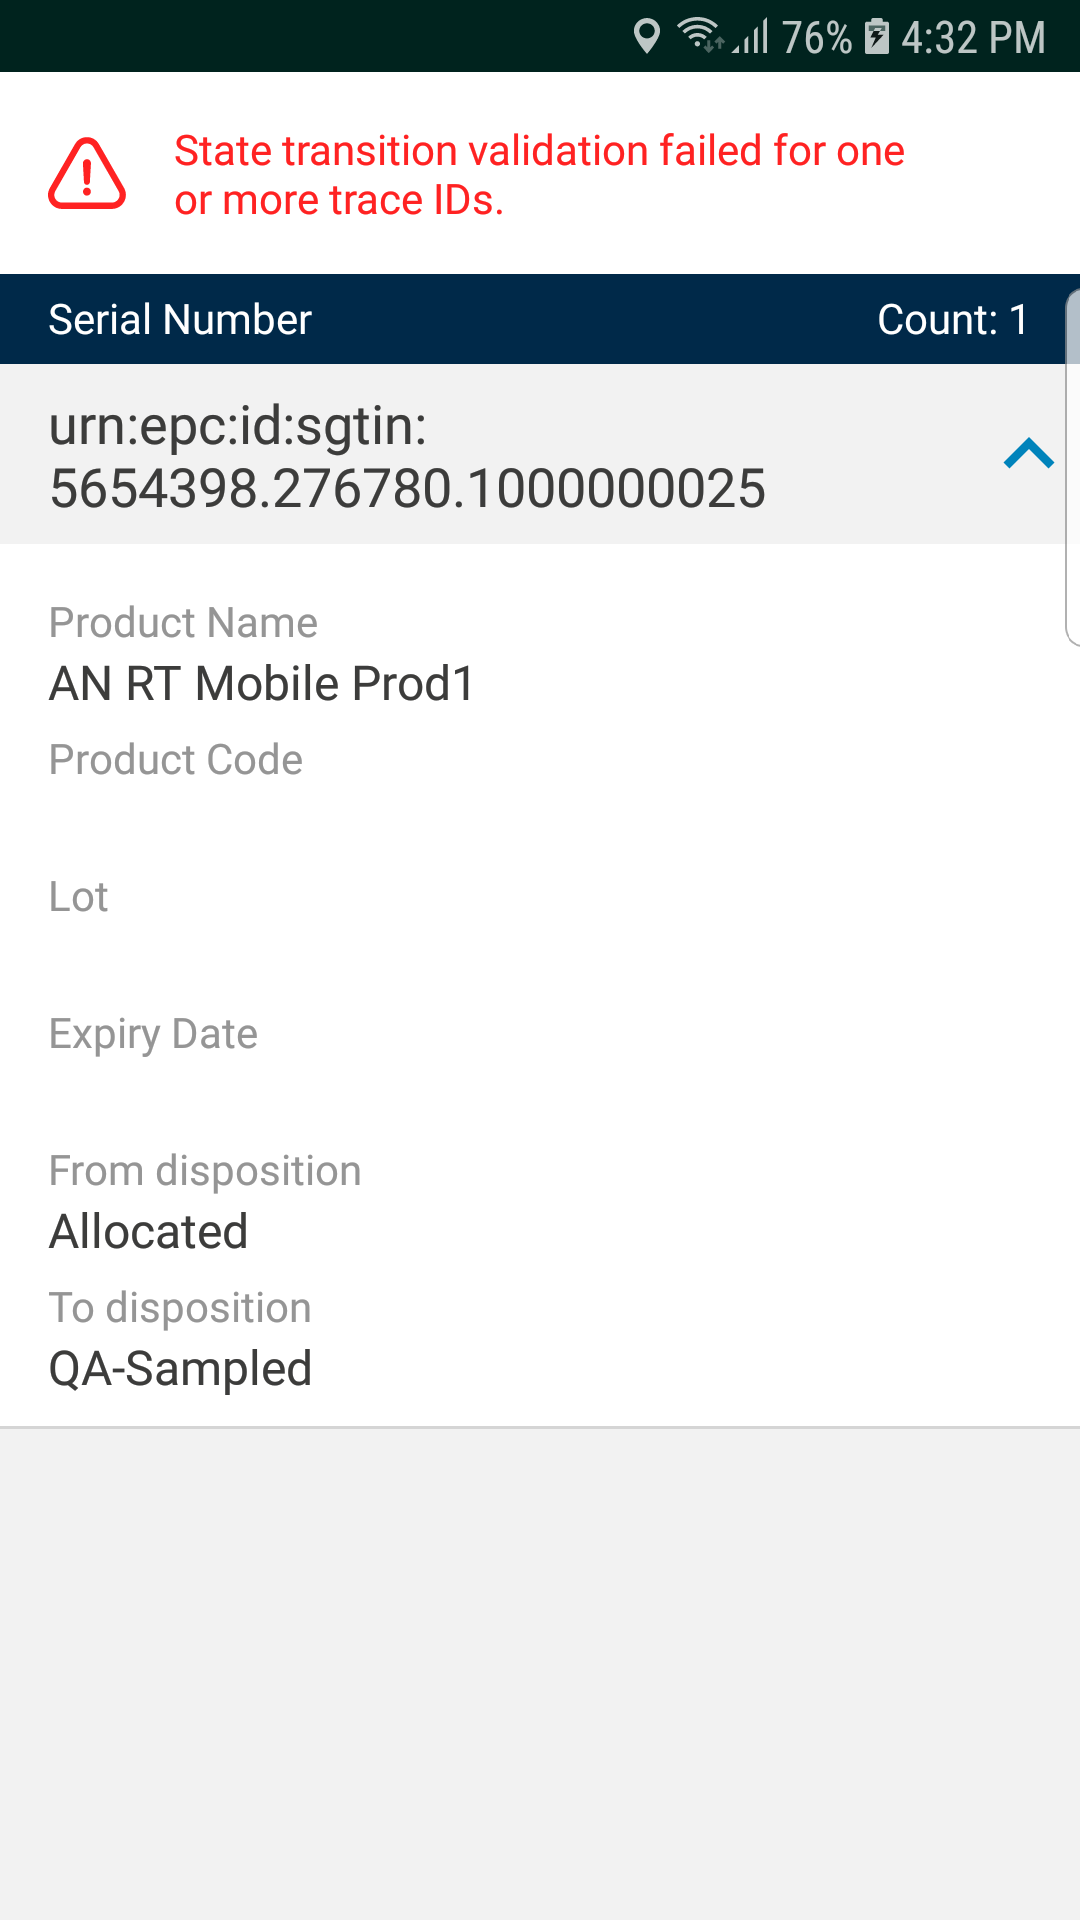
- If there is any issue with the change disposition for any of the trace IDs or if the transition is not allowed, you will see the following error message: