To make a partial receipt
Partial receiving of Totes involves two steps:
- Scan the Totes
- Receive the Totes
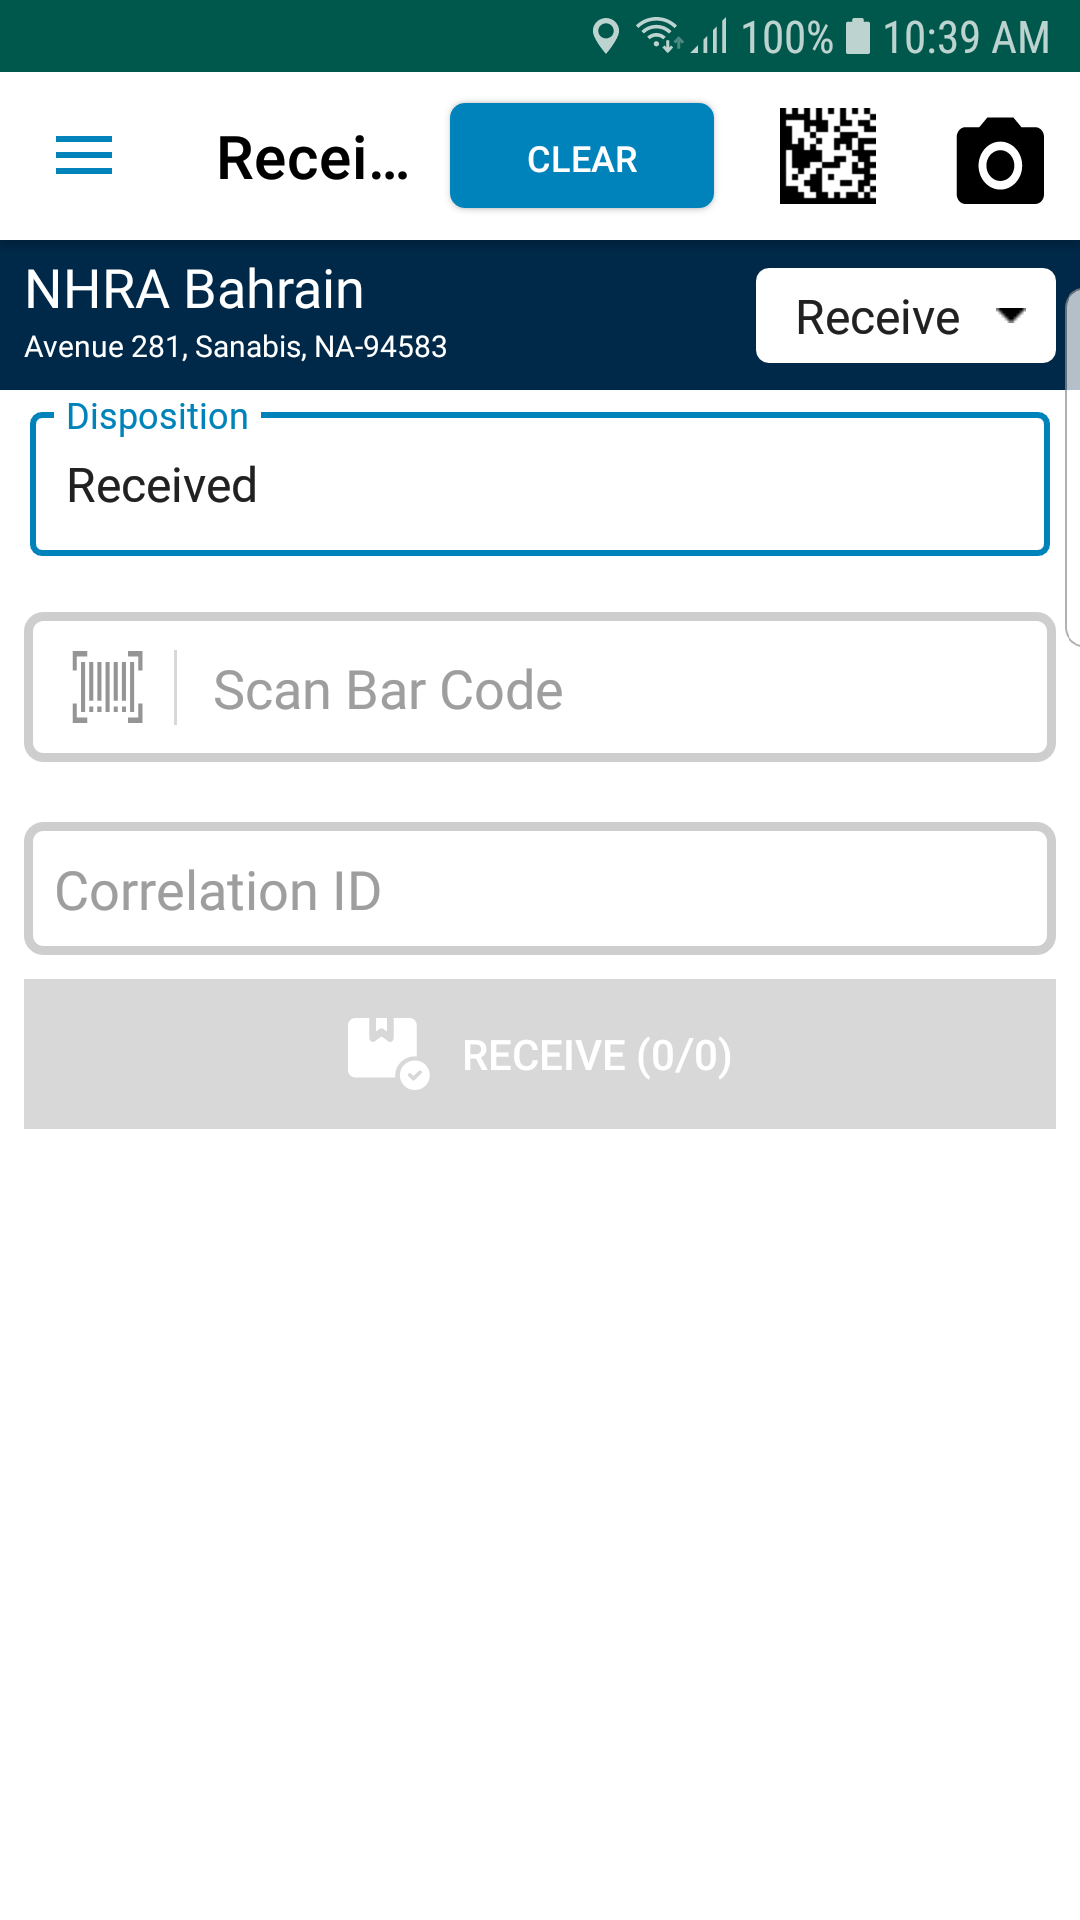
- Select the Receive option from the menu.
You will see the Receive screen as shown below:
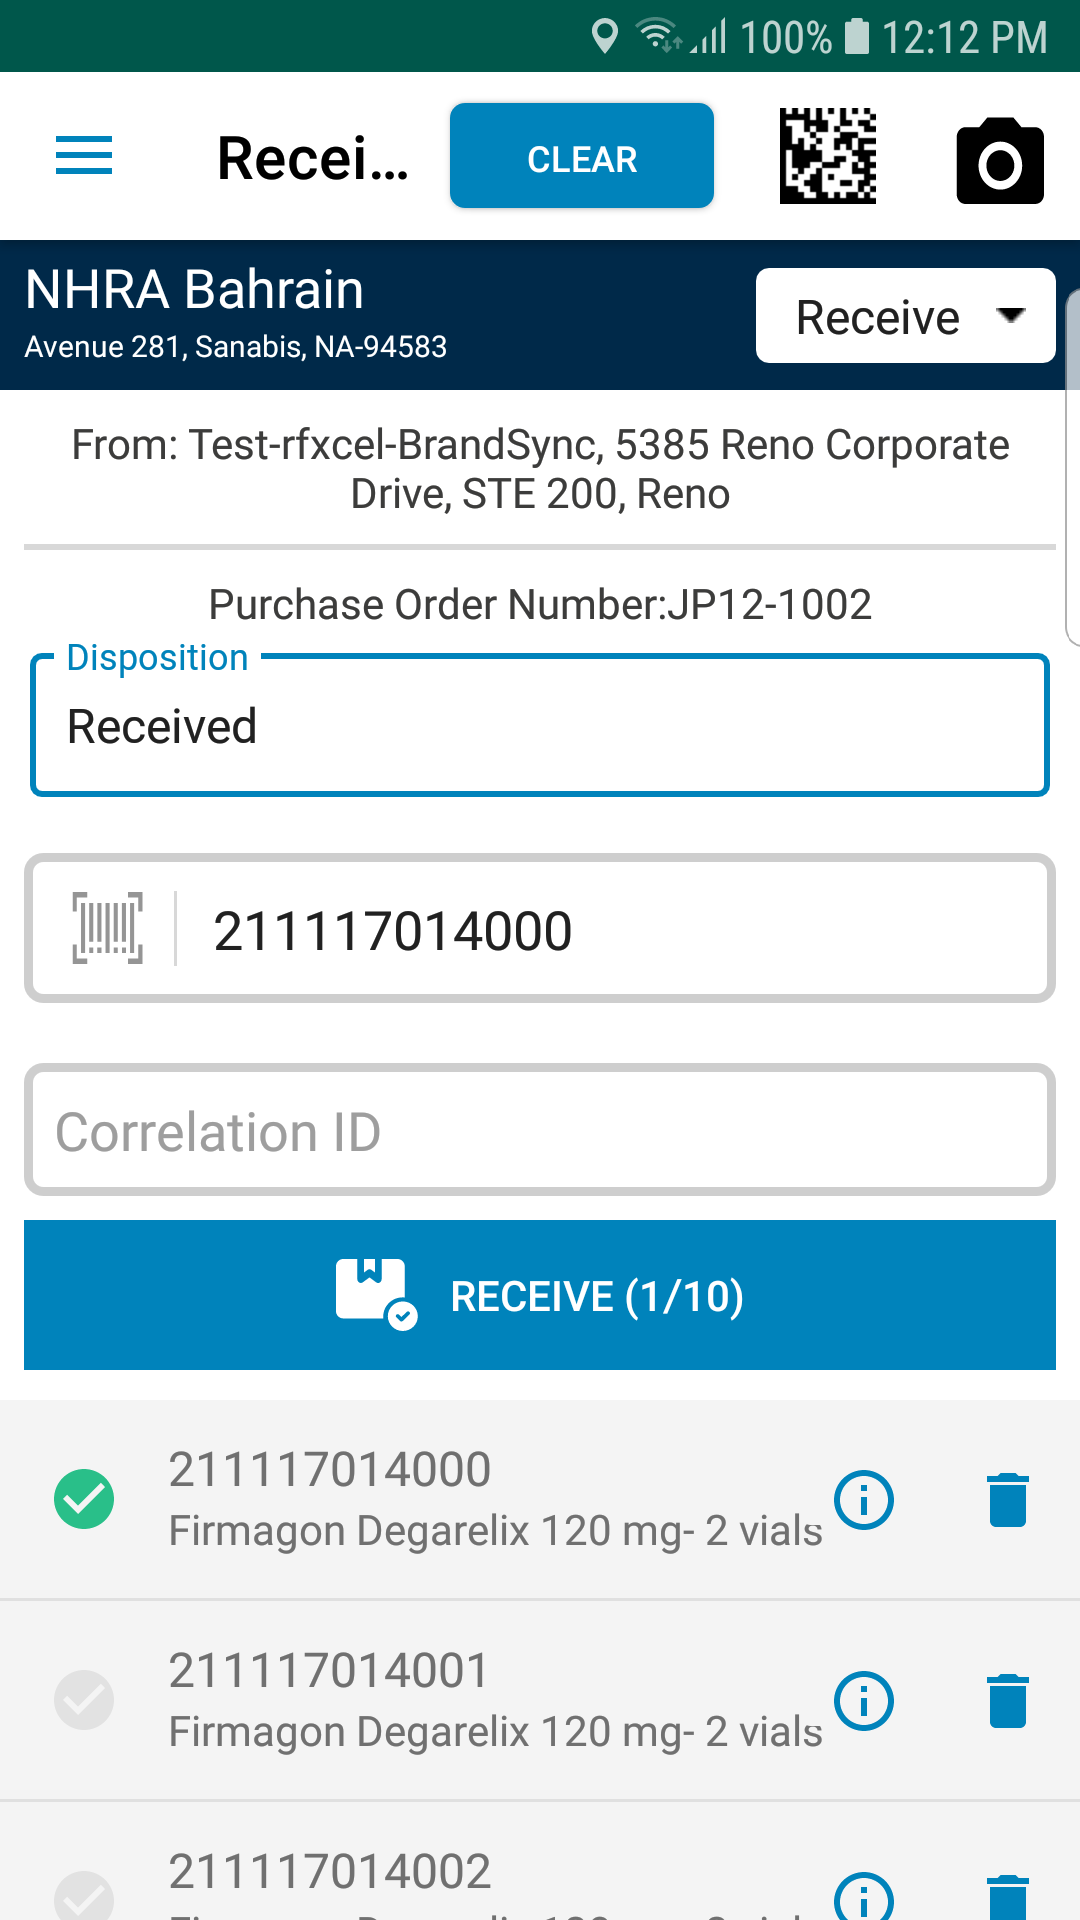
- Scan the barcode of the Tote.
You will see the following screen with the scanned Tote:
Note:
i. You can use the CLEAR option to clear the screen and start over again.
ii. When you scan a Tote from a shipment, the scanned Tote (with a tick mark on a green circle) will be displayed along with the other Totes in the same shipment. In this example, there are 10 Totes in the same shipment which is denoted by Receive (1/10). You can either scan all the other Totes to receive them all together or scan one or more other Totes to make partial receive from the shipment.
- Scan the next Tote from the same shipment.
You will see the screen as shown below:
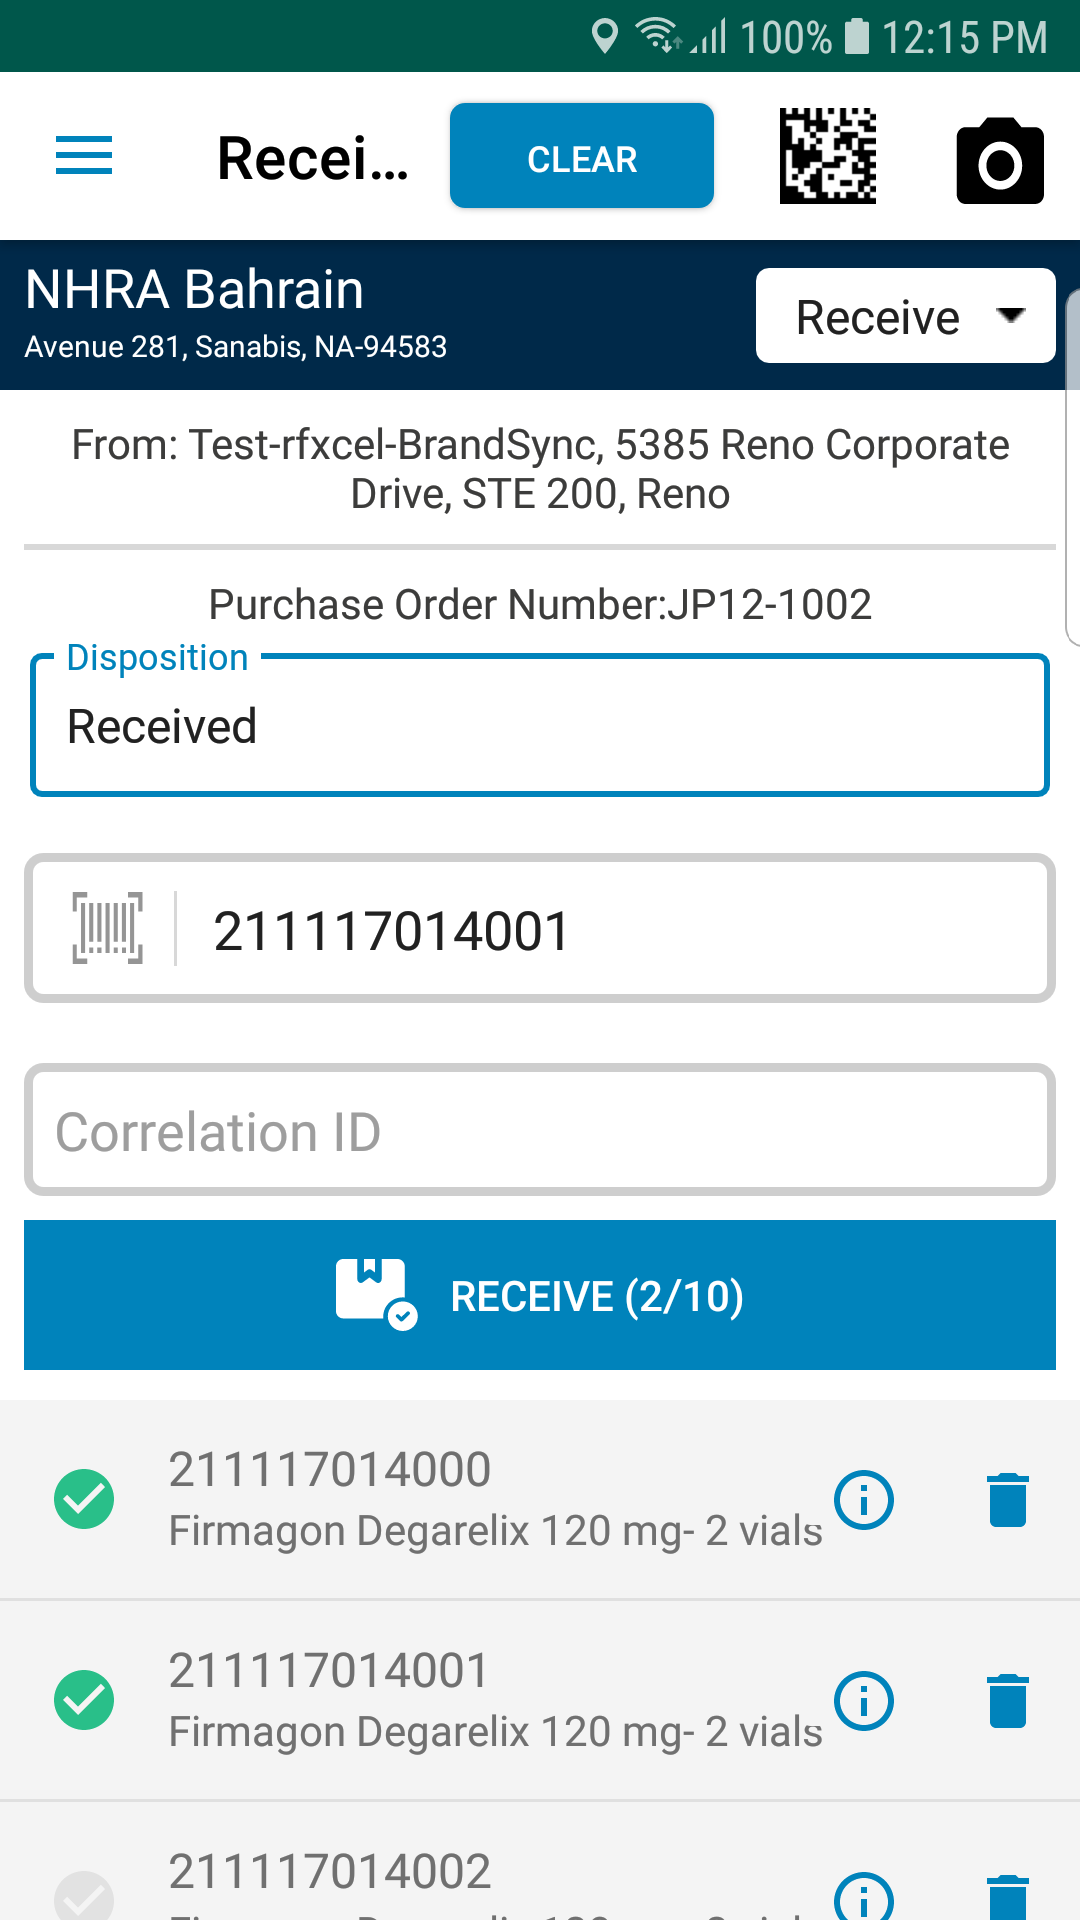
As per the above screenshot, 2 Totes from the same shipment is scanned.
- Enter the Correlation ID. This field is optional. When this field value is provided, the value will be displayed in the Receive event details page.
- Tap on the Receive option to receive the 2 Totes from the shipment.
- You will be asked for confirmation to receive partial shipment as shown below:
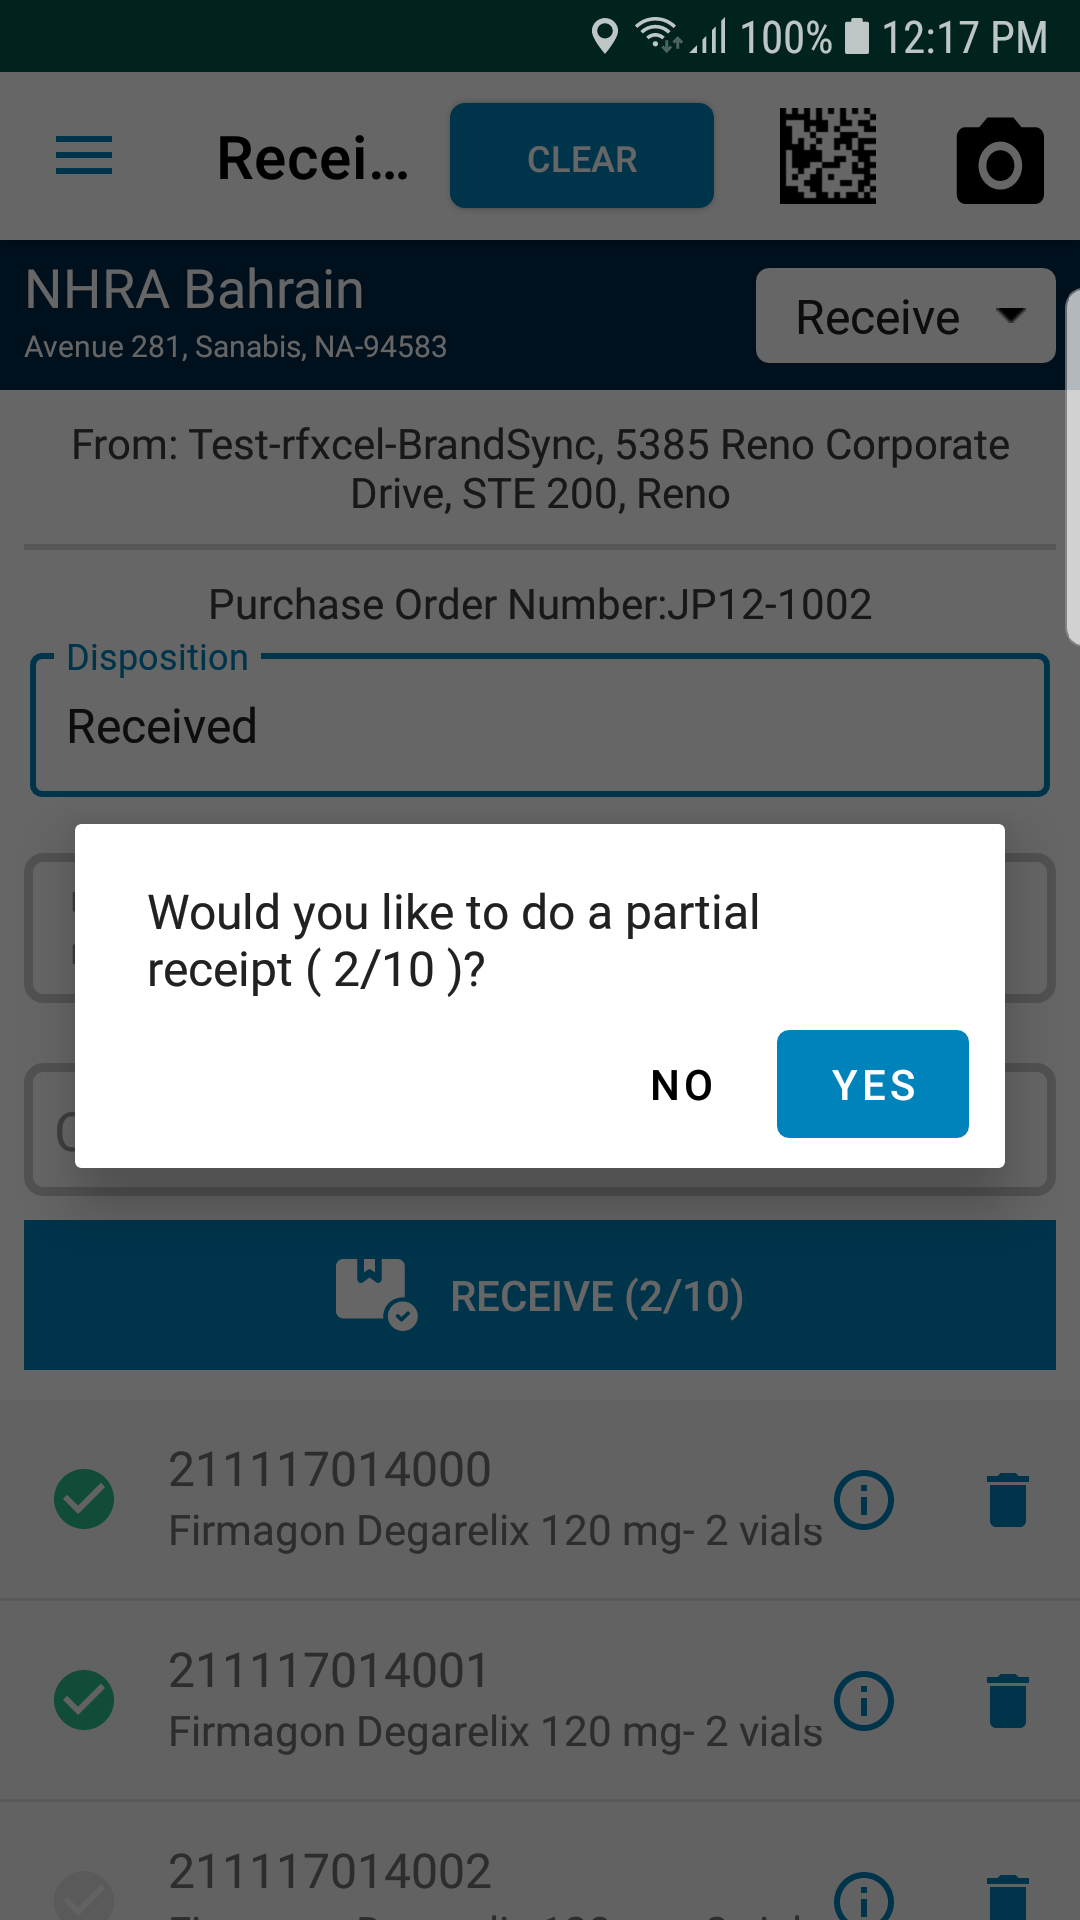
- Tap on Yes to receive partial shipment. Click No if you want to go back and scan the remaining Totes in the shipment.
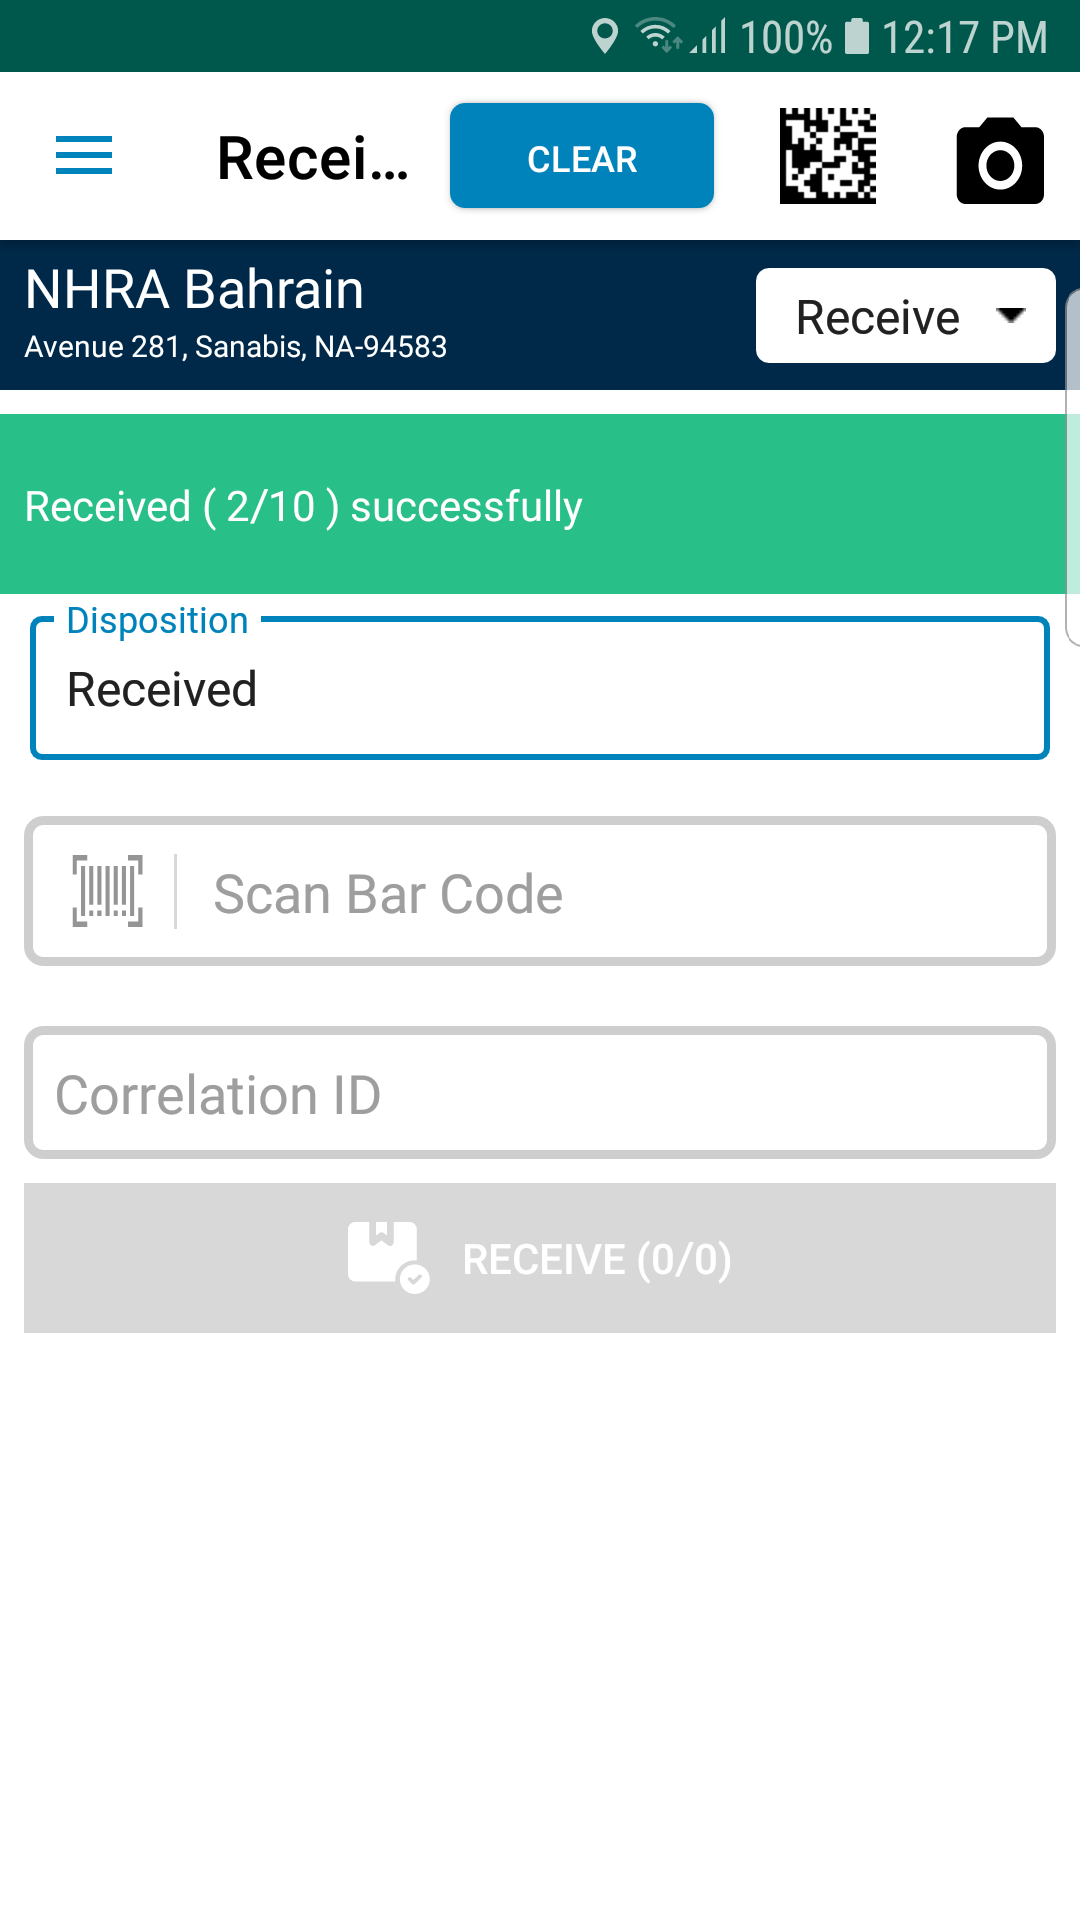
If you have selected Yes, you will see the success message as shown below:
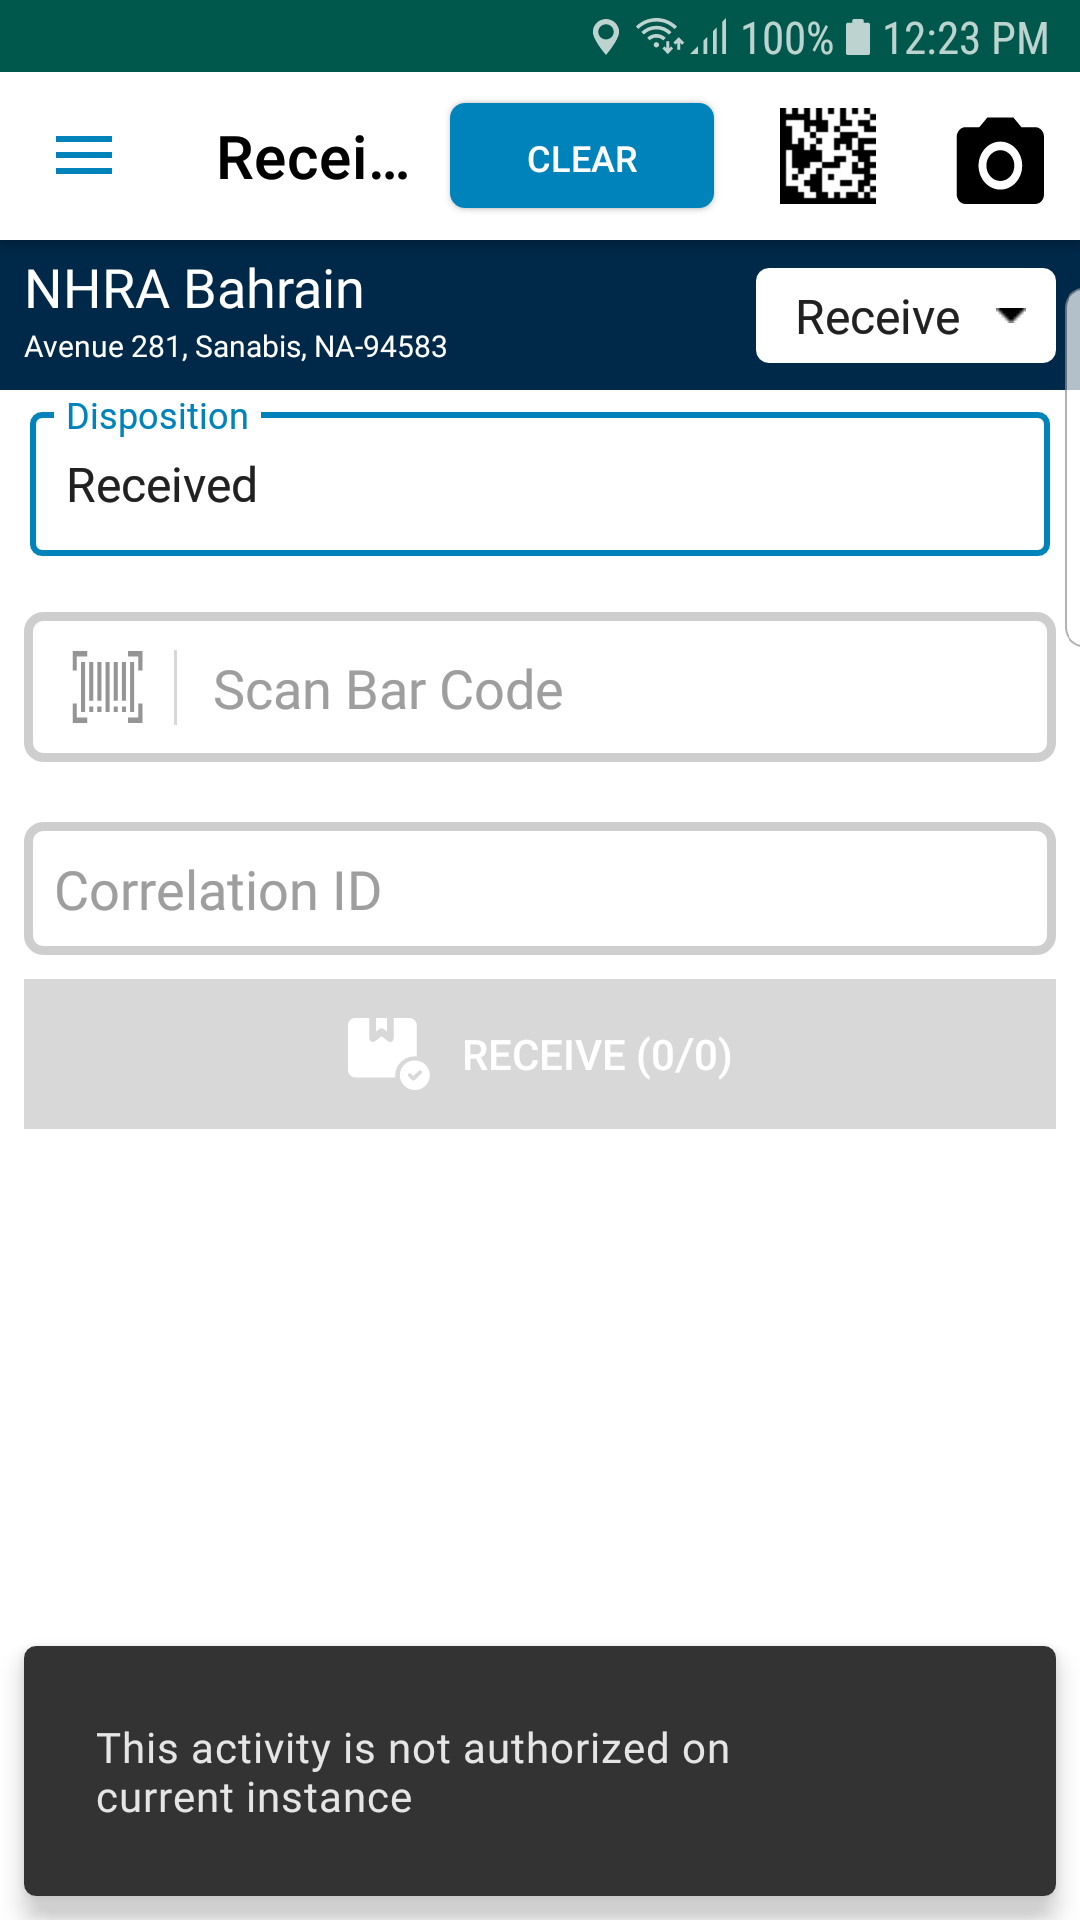
- When you scan a Tote that is in any other disposition other than 'shipped', you will get an error message as shown below:
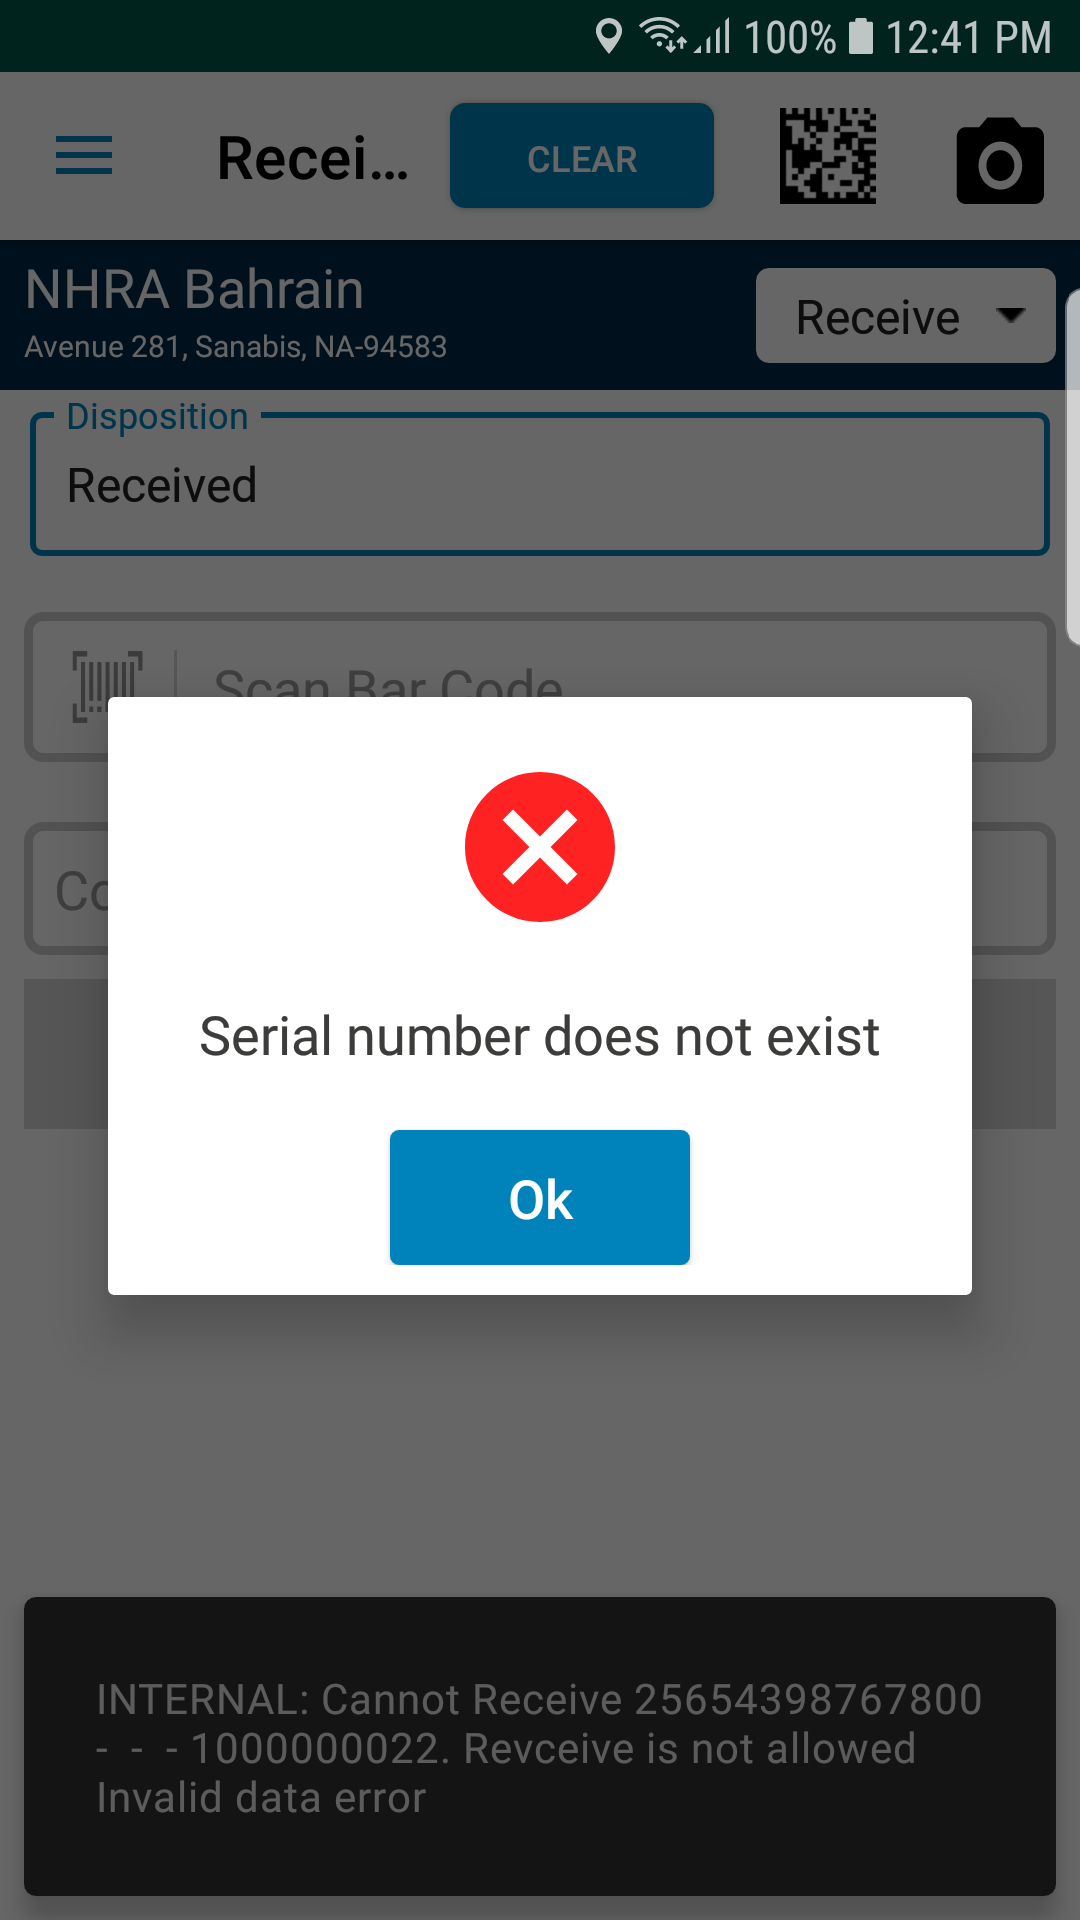
- When you scan a Tote that is not in the system, then you will get an error message as shown below: